How to De-Winterize a Travel Trailer Safely and Easily
Learn how to de-winterize a travel trailer safely and easily with our complete guide. Get your RV road-ready for camping season.

Spring is knocking at the door, and you know what that means. It's time to dust off those camping dreams and get your travel trailer ready for adventure. After months of sitting idle in storage, your home on wheels needs some TLC before hitting the open road again.
If you properly winterized your trailer last fall, congratulations on protecting your investment from freezing temperatures and potential damage. Now comes the flip side of that coin. All that antifreeze running through your plumbing system? Those bypassed water heaters and drained tanks? Everything needs to be reversed and checked before you can enjoy that first campfire of the season.
Here's the thing about de-winterizing that many RV owners don't fully appreciate. It's not just about flushing out pink antifreeze and turning things back on. This annual ritual serves as the perfect opportunity to inspect your entire rig, catch small problems before they become expensive disasters, and ensure everything operates safely for the adventures ahead.
Rushing through de-winterization is a recipe for trouble. Nobody wants to discover a cracked water line or malfunctioning propane system while parked at a campground miles from home. Taking your time with this process pays dividends in peace of mind and problem-free camping trips.
Understanding how to de-winterize a travel trailer safely and easily transforms what might seem like a daunting task into a manageable spring ritual. Whether you're a seasoned RVer who's done this a dozen times or a newcomer preparing for your first camping season, this comprehensive guide will walk you through every step.
So grab a notepad, maybe a cup of coffee, and let's get your travel trailer ready to roll.
Gathering Your Supplies and Tools
Before diving into the actual work, having everything you need within arm's reach makes the process infinitely smoother.
Essential Supplies List
You'll want to round up several items before starting. A garden hose with a drinking water safe designation is essential for flushing and filling your fresh water system. Regular garden hoses can leave an unpleasant taste and potentially introduce contaminants.
Fresh water tank sanitizer, usually a bleach-based solution or commercial RV tank sanitizer, eliminates any bacteria that might have developed during storage. A water pressure regulator protects your plumbing from campground water supplies that sometimes deliver excessive pressure.
Replacement water filter cartridges ensure clean, fresh-tasting water throughout the season. If your RV has an inline water filter, now's the time to swap in a new one.
Basic tools including screwdrivers, pliers, an adjustable wrench, and a flashlight come in handy for various inspections and minor adjustments. Teflon tape for plumbing connections prevents leaks when reassembling any fittings you may have disconnected.
Safety Equipment
Don't overlook safety gear. Rubber gloves protect your hands when handling antifreeze and sanitizing solutions. Safety glasses shield your eyes during inspection of overhead components and when working with propane systems.
A fire extinguisher should already be in your trailer, but verify it's charged and not expired. Carbon monoxide and propane detectors need fresh batteries and functional testing before you spend any nights inside.
How to De-Winterize a Travel Trailer Safely and Easily: Water System Steps
The water system requires the most attention during de-winterization since it's been filled with antifreeze all winter.
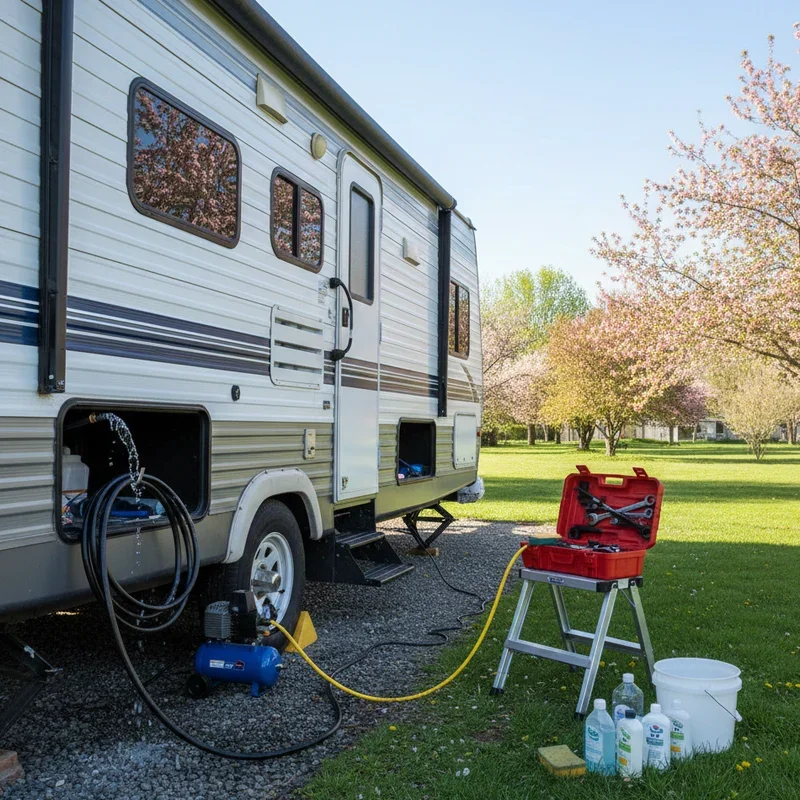
Flushing the Fresh Water Tank
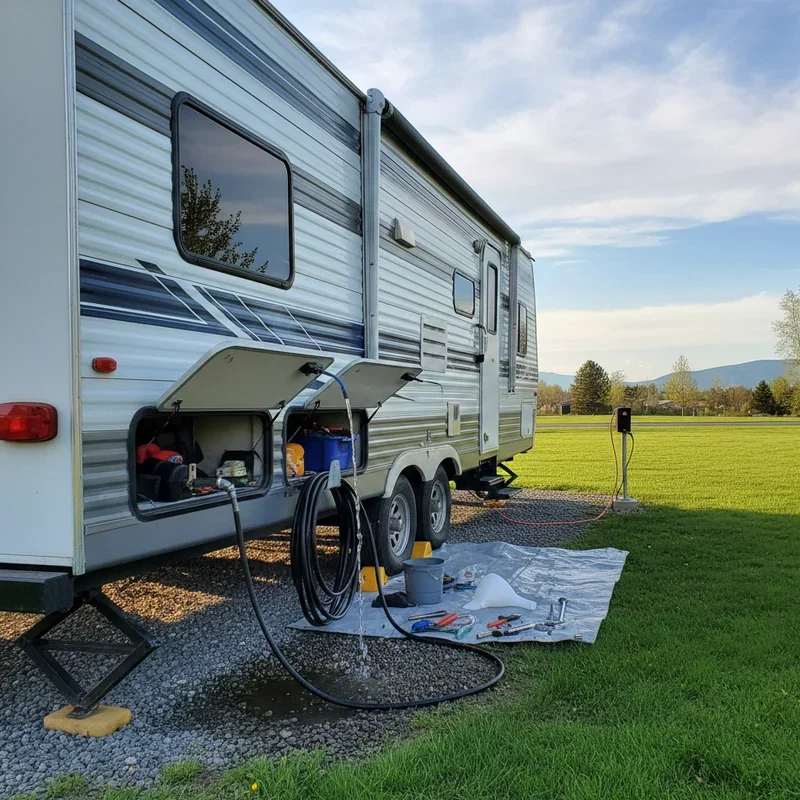
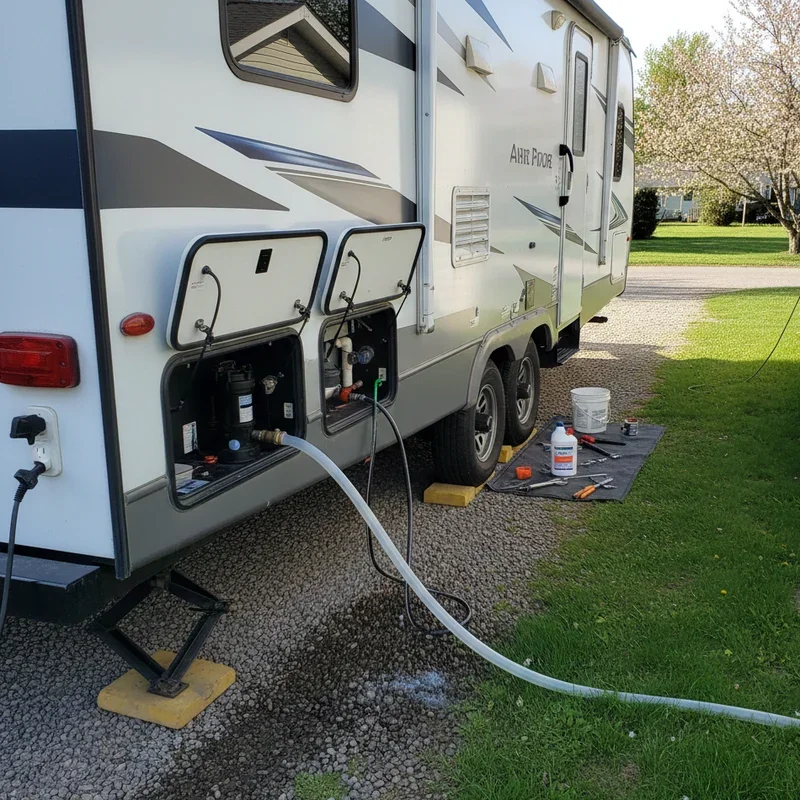
Start by draining any remaining antifreeze from your fresh water tank. Open the tank drain valve and let it empty completely. Some trailers have petcock-style drains while others use threaded plugs. Know what you're working with on your specific rig.
Once drained, close the valve and add clean fresh water. Fill the tank about one-third full, then add your sanitizing solution according to product directions. For bleach, the typical ratio is about one quarter cup per fifteen gallons of tank capacity.
Fill the tank completely after adding sanitizer. Let this solution sit in the tank for several hours, or even overnight if possible. This kills any bacteria or mold that might have developed during storage.
Flushing the Plumbing Lines
With sanitizing solution in your tank, turn on the water pump and open each faucet one at a time. Start with the faucet closest to the tank and work your way outward. Run water until you smell the sanitizer coming through, then move to the next fixture.
Don't forget the often-overlooked fixtures. The outside shower, if equipped, needs flushing too. The toilet should be flushed several times. Ice maker lines, if your refrigerator has one, require attention as well.
After all lines contain sanitizer, let everything sit for a few hours. Then drain the entire system and refill with fresh water. Run every faucet again until the water runs clear with no sanitizer smell. This might take several tank fills depending on your system size.
Reactivating the Water Heater
Your water heater was bypassed during winterization to prevent filling it with antifreeze. Now it's time to bring it back into the circuit.
Locate the bypass valves, typically found near the water heater behind an access panel. Return these valves to their normal operating positions. Configurations vary by manufacturer, so consult your owner's manual if you're unsure.
Remove the anode rod from the water heater drain and inspect it. If it's significantly corroded or less than half its original diameter, replacement is wise. These sacrificial rods protect your tank from corrosion and are inexpensive to replace.
Before turning on the water heater, ensure the tank fills completely with water. Run a hot water faucet until steady flow emerges, indicating the tank is full. Never operate a water heater with an empty tank as this can damage the heating element or tank lining.
Inspecting and Testing Propane Systems
Propane powers many of your trailer's essential systems, making proper inspection critical for safety.
Visual Inspection
Examine all visible propane lines for cracks, wear, or damage. Rodents love chewing on rubber propane hoses during winter storage, creating dangerous leak points. Any questionable lines should be replaced before operating propane appliances.
Check connections at the propane tanks and at each appliance. Look for corrosion, loose fittings, or signs of previous leaks indicated by discoloration or residue.
Inspect the propane regulator for damage. Regulators typically last about ten years, though harsh conditions can shorten their lifespan. If yours is approaching that age, consider preventive replacement.
Leak Testing
With your propane tank valve open, apply soapy water to every connection point. Bubbles indicate leaks that need addressing before using any propane appliance.
Pay particular attention to connections at the tanks, the regulator, and where lines enter the trailer body. These junction points are most susceptible to developing leaks over time.
If you detect any leaks you can't easily fix by tightening connections, consult a certified RV technician. Propane leaks are serious business and not worth risking.
Testing Appliances
Light each propane appliance and verify proper operation. The furnace should ignite reliably and produce heat without unusual odors or sounds. The stove burners should light evenly with blue flames, not yellow or orange.
Test the refrigerator in propane mode, confirming it cools properly. Check the water heater's propane burner operation separately from its electric element if it has both options.
Any appliance that won't light, burns unevenly, or produces concerning odors needs professional inspection before use.
Electrical System Checks
Your trailer's electrical systems need attention after months of dormancy.
Battery Inspection and Charging
Retrieve your batteries if you removed them for winter storage. Inspect terminals for corrosion and clean them with a baking soda solution if needed.
Check electrolyte levels in non-sealed batteries, topping off with distilled water if necessary. Connect a quality battery charger and bring batteries to full charge before reinstalling.
Test battery voltage with a multimeter. Fully charged 12-volt batteries should read around 12.6 to 12.8 volts. Batteries that won't hold a charge or show significant decline may need replacement.
Testing Shore Power Systems
Plug your trailer into shore power and verify proper operation. Check that the converter charges your house batteries and that all 120-volt outlets function.
Test GFCI outlets by pressing the test button and confirming power cuts. Reset and verify power returns. These safety devices protect against electrical shock in wet areas.
Inspect the power cord for damage including cracks, fraying, or burn marks. Damaged cords create fire and shock hazards and should be replaced immediately.
Checking 12-Volt Systems
Test all 12-volt lights, fans, and accessories. Interior lights, exterior porch lights, and running lights all deserve verification.
Check slide mechanisms if your trailer has slide-outs. Operate them fully extended and retracted while watching for unusual sounds or hesitation that might indicate developing problems.
Test your carbon monoxide and propane detectors, replacing batteries if you haven't already. These life-safety devices require proper function before occupying the trailer.
How to De-Winterize a Travel Trailer Safely and Easily: Exterior Inspection
The outside of your trailer needs thorough examination after winter storage.
Roof and Seam Inspection
Climb up and carefully walk your roof, looking for cracks, bubbles, or separation in the roofing material. Pay special attention to seams around vents, air conditioners, and antennas.
Check all sealant around penetrations. Dried, cracked, or separated sealant needs removal and replacement to prevent water intrusion. Roof leaks cause extensive damage that's expensive to repair.
Clean the roof surface of debris, leaves, and dirt that may have accumulated. This maintenance extends roof life and helps you spot problems more easily.
Tire Inspection
Examine all tires including the spare for cracks, bulges, or uneven wear. Tires that sat flat-spotted over winter may show visible deformation.
Check tire pressure against the ratings shown on the tire sidewall. Inflate to proper pressure and recheck after a few days since tires that sat deflated may continue losing air.
Inspect wheel lug nuts for tightness. Torque them to manufacturer specifications if you have a torque wrench, or at least verify they're snug.
Seals and Weather Stripping
Examine door seals, window seals, and any weather stripping around slide-outs or compartments. Dry, cracked, or compressed seals allow water and air infiltration.
Open all exterior compartment doors and check their seals as well. Storage compartment leaks can damage items inside and allow moisture into wall cavities.
Replace any compromised seals before hitting the road. These components are inexpensive and easy to replace yourself.
Interior Preparation
The inside of your trailer needs freshening up before occupancy.
Deep Cleaning
After months in storage, everything deserves a good cleaning. Vacuum carpets and upholstery, wipe down all surfaces, and clean appliance interiors.
Check inside cabinets and storage areas for signs of rodent activity including droppings, nesting materials, or chewed items. Address any infestations before they worsen.
Air out the trailer by opening windows and doors on a nice day. Fresh air eliminates musty storage odors and helps detect any unusual smells that might indicate problems.
Testing Interior Systems
Operate all vent fans and verify proper function. The bathroom vent and range hood both need testing.
Test all window shades and blinds. These can become stuck or damaged during storage. Ensure windows open and close properly with functioning locks.
Run water through all drains and verify proper drainage. Flush the toilet multiple times checking for leaks or running issues.
Final Steps Before Your First Trip
With major systems checked, a few final tasks complete your de-winterization.
Documentation and Registration
Verify your registration is current and all necessary documents are in the trailer. Check insurance coverage dates and policy details.
Update any roadside assistance memberships if needed. Having current coverage provides peace of mind on the road.
Emergency Kit Check
Inspect your emergency kit and replenish any items that may have expired or been used. First aid supplies, flashlights, and batteries all deserve attention.
Verify you have basic tools, a tire changing kit, and leveling equipment ready for use. These items can turn roadside problems into minor inconveniences rather than trip-ending disasters.
Test Trip
Before committing to a distant destination, consider a short shakedown trip. An overnight stay at a nearby campground reveals any lingering issues while you're close to home and resources.
Use all systems during this test trip including running water, propane appliances, and electrical connections. Better to discover problems now than hundreds of miles from your driveway.
Conclusion
Learning how to de-winterize a travel trailer safely and easily prepares you for a season of memorable adventures without unexpected breakdowns or safety concerns. Taking time to properly flush water systems, test propane components, inspect electrical connections, and examine your trailer's exterior prevents most common camping problems. This annual ritual doubles as valuable inspection time that catches small issues before they become expensive repairs. With proper de-winterization complete, you can hit the road with confidence.
Read next: 15 Travel Breakfast Ideas for Easy Meals on the Go
Frequently Asked Questions
1.How long does it take to de-winterize a travel trailer properly?
Plan for four to six hours to thoroughly complete all de-winterization steps without rushing through anything.
2.Can I skip sanitizing my fresh water tank during de-winterization?
Skipping sanitization risks bacteria growth that can cause illness, so this step remains highly recommended annually.
3.How much water does it take to flush all the antifreeze?
Expect to use several full tank capacities, typically three to five fills, for complete antifreeze removal.
4.Should I de-winterize my trailer before or after storage renewal?
De-winterize before extended trips but after confirming your storage situation for the upcoming camping season.
5.Is it safe to drink water immediately after de-winterizing?
Wait until you've completely flushed sanitizing solution and water runs clear with no residual taste.
Stay up to date with our latest ideas!