How Long Does It Take to Break In Hiking Boots?
Discover how long does it take to break in hiking boots with expert tips. Learn timelines, techniques, and signs your boots are ready.
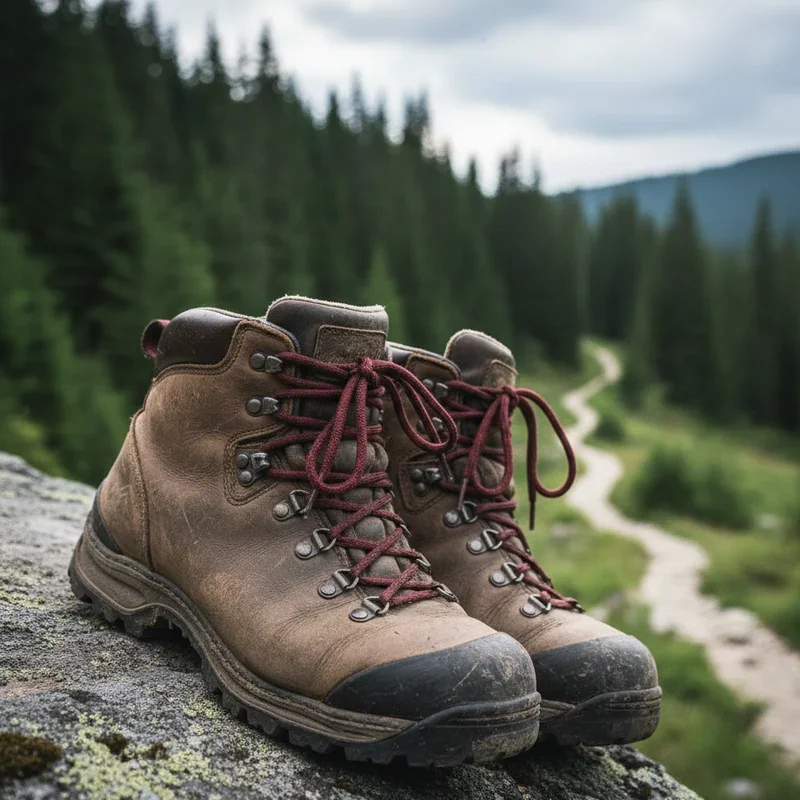
You've just bought a gorgeous pair of hiking boots. They look fantastic, smell like adventure, and promise to carry you up mountains and through valleys for years to come. There's just one tiny problem. They feel like medieval torture devices on your feet right now.
We've all been there, trust me. That excitement of unboxing new boots quickly turns into wincing with every step during those first few wears. The stiff leather, rigid soles, and unforgiving structure seem determined to punish your feet for daring to take them out of the box.
Here's the thing about hiking boots that many outdoor enthusiasts learn the hard way. Wearing brand-new boots straight onto the trail is a recipe for disaster. Blisters, hot spots, and foot pain can turn what should be an amazing hiking experience into a painful slog back to the trailhead.
The break-in period exists for good reason. Your boots need time to soften, mold to your unique foot shape, and become the comfortable companions they're destined to be. But how long does this process actually take? Is there any way to speed things along without damaging your investment?
Understanding how long does it take to break in hiking boots helps you plan ahead and avoid those painful rookie mistakes. Whether you've got a big trip coming up or simply want to start hitting the trails comfortably, knowing what to expect makes all the difference.
So lace up those new boots, grab a comfortable seat, and let's walk through everything you need to know about breaking in your hiking footwear properly.
Understanding the Break-In Process
Before diving into timelines, let's explore what's actually happening when boots break in.
What Happens During Break-In
New hiking boots are constructed from materials that haven't yet adapted to the specific contours of your feet. Leather and synthetic materials start out stiff and inflexible, designed to provide support and protection but not yet customized to your anatomy.
During the break-in process, these materials gradually soften and flex in response to your foot movements. The boot's structure learns the shape of your heel, the width of your forefoot, and the way your arch curves. Essentially, you're training your boots to fit you perfectly.
The insole compresses in spots where you apply the most pressure. The heel counter, that stiff cup surrounding your heel, molds to your specific heel shape. The toe box expands slightly to accommodate your toes' natural spread during walking.
This is why properly broken-in boots feel so dramatically different from new ones. They've literally reshaped themselves around your feet through repeated wear and movement.
Factors Affecting Break-In Time
Not all boots require the same break-in period. Several variables influence how long you'll spend in that uncomfortable adjustment phase.
Boot construction plays the biggest role. Full-grain leather boots typically require the longest break-in time, sometimes taking weeks of regular wear. These traditional hiking boots are incredibly durable but start out quite rigid.
Synthetic materials and fabric panels break in much faster, often requiring just a few days of wear. Modern hiking boots often combine materials, falling somewhere between pure leather and all-synthetic in terms of break-in requirements.
Boot height matters too. Ankle-high hiking shoes flex more easily than mid-cut boots, which in turn break in faster than tall backpacking boots. More material simply means more breaking in.
Your foot shape and gait patterns also influence the process. Feet with unusual proportions or pronounced features may take longer to mold boots than more average-shaped feet.
How Long Does It Take to Break In Hiking Boots? Timeline Overview
Let's get to the numbers you're actually wondering about.
Lightweight Hiking Shoes
Trail runners and lightweight hiking shoes with predominantly synthetic construction often require minimal break-in time. Many hikers find these comfortable enough for trail use after just two to five days of regular wear around town.
The flexible materials and athletic shoe-like construction mean less rigidity to overcome. Some people take these straight onto easier trails with no issues, though a few days of casual wear still helps prevent surprises.
If your lightweight hikers feel comfortable walking around the house and during errands, they're probably ready for trail duty. Watch for any rubbing or pressure points, but these shoes typically cooperate quickly.
Mid-Weight Hiking Boots
The most popular category for day hikers and weekend backpackers, mid-weight boots usually require one to three weeks of break-in time. This assumes you're wearing them regularly, not just letting them sit in the closet.
These boots often combine leather with synthetic materials, offering a balance between durability and flexibility. The break-in period reflects this middle-ground construction.
Plan on wearing your mid-weight boots around the house for a few days, then progressing to short walks, longer neighborhood strolls, and finally easier hikes before tackling more demanding terrain.
Heavy-Duty Backpacking Boots
Traditional leather backpacking boots built for heavy loads and rugged terrain demand the most patience. Expect anywhere from three to six weeks of dedicated break-in time for these serious boots.
The thick leather and robust construction that make these boots so durable also make them stubbornly stiff initially. Rushing this process virtually guarantees foot problems on the trail.
Some backpackers report break-in periods extending to 50 hours of wear or more for the stiffest leather boots. If you've invested in serious mountaineering boots, consider the break-in period part of your expedition preparation.
Signs Your Boots Are Properly Broken In
How do you know when the break-in process is complete? Your feet will tell you, but here are specific indicators to watch for.
Comfort Indicators
Properly broken-in boots feel like natural extensions of your feet rather than foreign objects strapped to your ankles. You should be able to walk for extended periods without thinking about your footwear at all.
The heel should stay firmly in place without slipping or rubbing. A broken-in heel counter has molded to your specific heel shape, eliminating that annoying movement that causes blisters.
Your toes should have room to wiggle and spread naturally without hitting the front of the boot during downhill walking. The toe box expands slightly during break-in to accommodate this natural movement.
The sole should flex smoothly with your foot's natural gait rather than fighting against it. That stiff, board-like feeling of new boots should transform into responsive flexibility.
Physical Changes in the Boot
Look at your boots and you'll see evidence of the break-in process. Creases form where the boot flexes with your foot movement. These flex points indicate the leather or synthetic material has learned your gait pattern.
The footbed shows compression patterns matching your foot's pressure points. The outline of your foot becomes visible in the insole after extended wear.
Leather develops a softer, more supple feel compared to its initial stiff state. The material should feel pliable rather than cardboard-like when you squeeze it gently.
Accelerating the Break-In Process
Got a hiking trip coming up sooner than ideal? These techniques can speed things along without damaging your boots.
Wear Them Everywhere
The simplest acceleration method is simply wearing your boots more. Every hour on your feet contributes to the break-in process, regardless of where you're walking.
Wear them to work if your workplace permits. Wear them while running errands, walking the dog, or doing household chores. Standing and cooking dinner in your hiking boots sounds ridiculous but absolutely counts toward break-in time.
The key is accumulating hours of wear. Even stationary wearing helps materials soften and mold, though actual walking accelerates the process further.
The Wet Leather Method
For full-grain leather boots specifically, some hikers swear by wearing damp boots to speed break-in. This controversial technique involves wetting the leather, putting on hiking socks, and wearing the boots until they dry.
The theory is that damp leather softens more easily and molds to your feet as it dries. When done carefully, this can compress a week's break-in into a day or two.
However, risks exist. Improper drying can damage leather, cause shrinking, or create mold issues. If you try this method, use only lukewarm water, stuff boots with newspaper overnight to absorb moisture, and treat with leather conditioner afterward.
Conditioning Treatments
Leather conditioners and boot oils soften materials, potentially reducing break-in time. Products like mink oil, beeswax treatments, and commercial boot conditioners penetrate the leather and increase pliability.
Apply conditioner according to product instructions, working it into seams and flex points where stiffness is most problematic. Let boots absorb the treatment overnight before wearing.
Be cautious with waterproof boots, as some conditioners can compromise water-resistant treatments. Check manufacturer recommendations before applying any products.
Targeted Stretching
If specific spots cause problems, boot stretching techniques can help. Professional boot stretchers apply pressure to tight areas, and some hiking stores offer this service.
Home remedies include stuffing tight toe boxes with wet newspaper and letting them dry, wearing thick socks to stretch tight areas, or using adjustable boot stretchers available at shoe stores.
Heel cups and spot-stretching liquids target specific problem areas without affecting the entire boot. These work well for isolated pressure points that don't resolve with general wear.
Common Break-In Mistakes to Avoid
Impatience leads to errors that cause pain or damage boots. Watch out for these common missteps.
Taking New Boots on Major Hikes
The single biggest mistake is heading out for a long hike in boots that haven't been properly broken in. That weekend backpacking trip is not the time to discover your boots rub your heel raw after mile three.
Always test boots on progressively longer and more challenging walks before committing to serious trail time. Start with flat terrain before tackling elevation, and limit distance until you're confident in the fit.
Getting stuck miles from the trailhead with painful blisters transforms an adventure into an ordeal. The break-in period exists specifically to prevent this scenario.
Ignoring Early Warning Signs
Hot spots and minor discomfort during initial wear tell you something. These sensations indicate areas where friction or pressure is building, signaling future blister locations.
Address warning signs immediately rather than pushing through the pain. Apply moleskin or blister bandages to problem areas. Consider whether lacing adjustments might help.
Persistent hot spots that don't improve with break-in time suggest fit problems that no amount of wearing will resolve. The boot simply might not be right for your foot.
Over-Conditioning Leather
More isn't always better with leather treatments. Excessive conditioning can oversaturate leather, weakening its structure and reducing lifespan.
Follow product recommendations for application frequency. Most boots need conditioning only once or twice during break-in, then periodically for maintenance throughout their lifespan.
Watch for signs of over-conditioning like leather that feels overly soft, oily residue that won't absorb, or reduced water resistance.
How Long Does It Take to Break In Hiking Boots? Adjusting Your Expectations
Understanding realistic timelines helps you plan effectively for upcoming adventures.
Planning for New Boot Purchases
Buy hiking boots well before you need them. For a significant hiking trip, purchase boots at least a month in advance for lightweight models and two months or more for heavy leather boots.
This timeline gives you adequate break-in time plus a buffer for exchanges if the boots simply don't work for your feet. Discovering a fundamental fit problem two days before a backpacking trip leaves no good options.
Quality outdoor retailers accept returns on boots that don't work out, but this exchange process takes time. Building in extra weeks prevents last-minute scrambles.
When to Consider a Different Boot
Sometimes boots just don't break in comfortably regardless of time invested. Persistent pain, unresolvable pressure points, or ongoing discomfort after adequate break-in time suggests the boots aren't right for you.
Don't fall into the sunk cost fallacy. Keeping boots that hurt your feet because you've invested time breaking them in makes no sense. Your feet will thank you for admitting defeat and trying something different.
Different boots fit different feet. A boot that works brilliantly for one hiker might be completely wrong for another despite identical sizes. Finding your perfect boot sometimes requires trying several options.
Caring for Boots During and After Break-In
Proper maintenance ensures your boots reach their full potential and last for years.
During Break-In
Clean boots after each wear to remove dirt and debris that can damage materials. A stiff brush handles dried mud, while a damp cloth addresses lighter soiling.
Allow boots to dry completely between wears. Stuff them with newspaper to absorb moisture and maintain shape. Never dry boots near direct heat sources, which can crack leather and damage adhesives.
Inspect boots regularly during break-in for signs of defects or quality issues. Manufacturing problems sometimes become apparent only after wear begins.
Long-Term Care
Once broken in, maintain boots with regular cleaning, conditioning, and waterproofing treatments. Well-maintained boots can last a decade or more of trail use.
Store boots in cool, dry locations away from direct sunlight. UV exposure degrades materials over time, even in storage.
Replace worn insoles and laces as needed. These components wear faster than the boot itself and significantly impact comfort and support.
Conclusion
Answering how long does it take to break in hiking boots depends primarily on boot construction, with lightweight synthetic models requiring just days while heavy leather boots may need weeks of regular wear. Patience during this process prevents painful blisters and foot problems that can ruin hiking experiences. Accelerating break-in through consistent wear, proper conditioning, and gradual terrain progression helps you hit the trails faster without cutting corners. Your investment in proper break-in time pays dividends through years of comfortable adventures ahead.
Read next: 15 Hiking Snacks Ideas to Keep You Energized on Trails
Frequently Asked Questions
1.Can I hike in brand new boots without breaking them in first?
Hiking in new boots risks painful blisters and hot spots that can ruin your trip.
2.Do synthetic hiking boots need break-in time like leather boots?
Synthetic boots require significantly less break-in time, often just a few days of regular wear.
3.How many miles should I walk to break in hiking boots?
Most hikers need twenty to fifty miles of varied terrain to fully break in mid-weight boots.
4.Will boot conditioner speed up the break-in process for leather boots?
Yes, quality leather conditioner softens materials and can reduce break-in time when applied properly.
5.What should I do if boots still hurt after weeks of break-in?
Persistent pain after adequate break-in suggests poor fit, and you should consider different boots entirely.
Stay up to date with our latest ideas!